


Inserting an effect on an auxiliary track is advisable when you want to apply the same effect to many different audio/instrument tracks. The key to working with any type of audio routing is understanding "bussing."
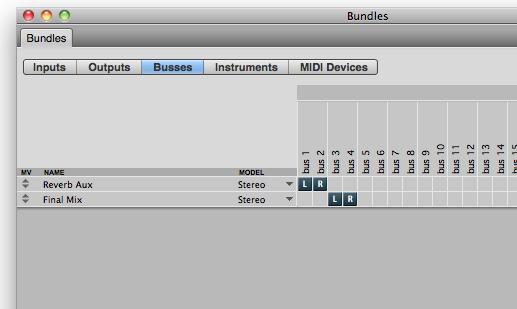
In DP, buses help connect audio tracks and aux tracks together, in any combination. In this example, we’re going to add an aux track to host a reverb plug-in to be used by multiple tracks. Before getting started, open up the "Bundles" window by going to Studio -> Bundles. Click on the "Busses" tab. Click "add" and let's create 2 busses- by default, they're labelled "bus 1-2" and "bus 3-4." I've renamed them to be more useful: "Reverb Bus" and "Final Mix Bus."
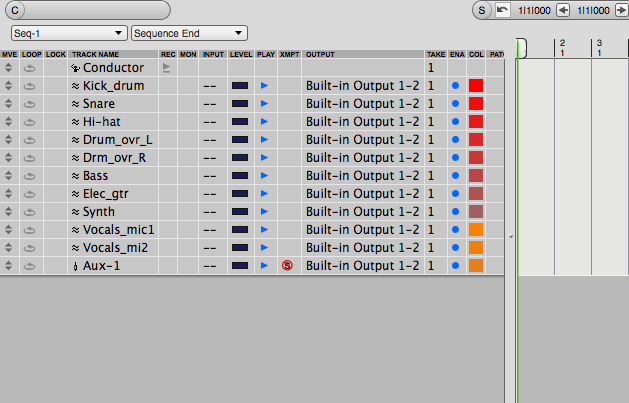
Now, looking at the Tracks window, suppose we already have a session with 10 audio tracks. Let's add an aux track: Project -> Add Track -> Aux Track.
Next, let's also add another stereo audio track to serve as a final mix track. I'm labeling the aux track "Reverb Aux," and the stereo audio, "Final Mix." Click on the "input" for the reverb aux track: you should see a list of inputs, including the busses we made.

Choose "Reverb Bus" for the input. Set the output to "Final Mix Bus" (Also set the Final Mix track input to "Final Mix Bus."
In this example, I'm going to set the output of all other tracks to "Final Mix Bus."
(This part is optional)
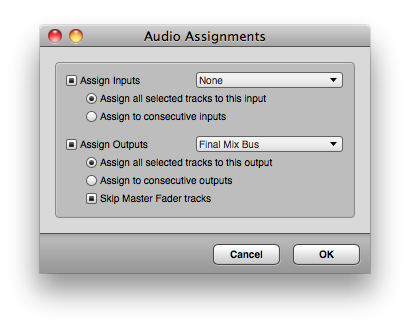
A nice shortcut is selecting the first 10 audio tracks, and then Studio -> "Audio Assignments..." You can set all inputs to "None" and all outputs to "Final Mix Bus."
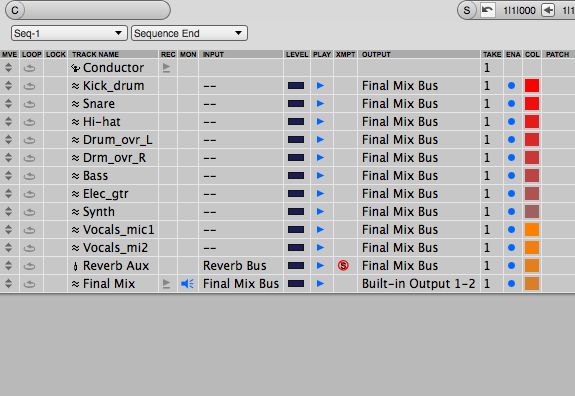
In the end, your session should look like this:
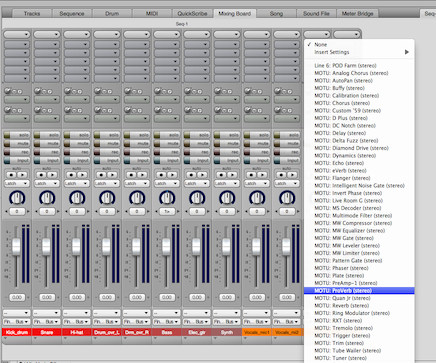
Almost done. Switch over to the Mixing view. Let's insert DP's "ProVerb (stereo)" on the Reverb Aux track. Click and hold on the dark gray boxes near the top of the channel to see the list of inserts.
You can use the default reverb or pick one yourself. Just set the level to 100%.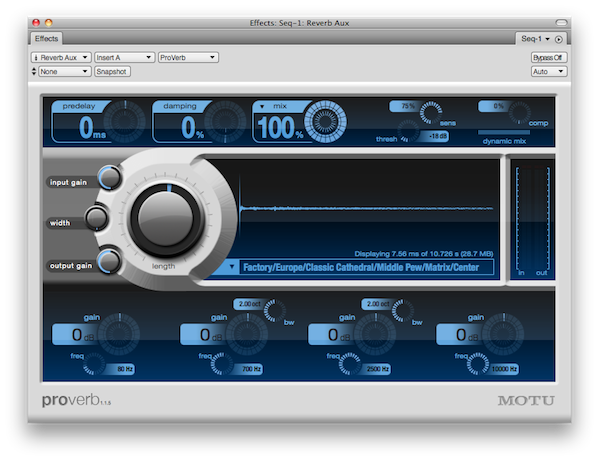
And now the FUN part! Above the "mute" and "solo buttons are the sends. Choose "Reverb Bus" for any track whose signal you want to send the reverb aux. You can move the knob to the left to set the amount of signal that is sent to reverb.

That’s it!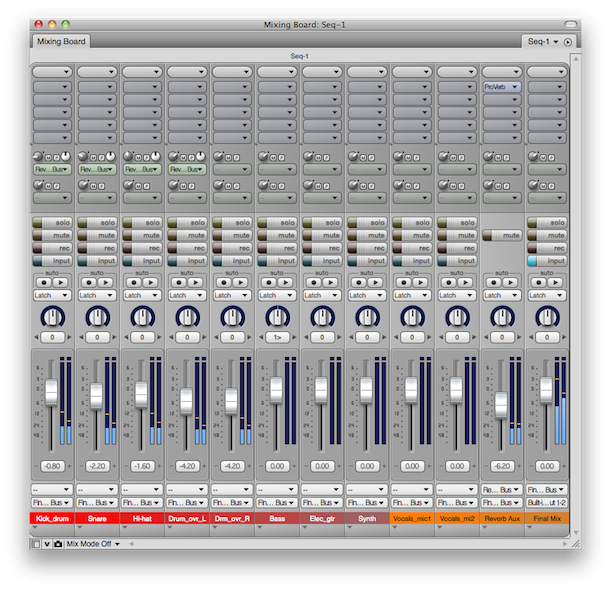
Notice that the output of all the audio tracks (and the Reverb Aux track) are routed to the Final Mix track (via the Final Mix Bus). But the audio tracks "send" their audio into the Reverb Aux using the Reverb Bus. If you want to learn more about bussing and using effects on aux tracks, make sure to sign up for Training Session at the Learning Center.
In DP, buses help connect audio tracks and aux tracks together, in any combination. In this example, we’re going to add an aux track to host a reverb plug-in to be used by multiple tracks. Before getting started, open up the "Bundles" window by going to Studio -> Bundles. Click on the "Busses" tab. Click "add" and let's create 2 busses- by default, they're labelled "bus 1-2" and "bus 3-4." I've renamed them to be more useful: "Reverb Bus" and "Final Mix Bus."
Now, looking at the Tracks window, suppose we already have a session with 10 audio tracks. Let's add an aux track: Project -> Add Track -> Aux Track.
Next, let's also add another stereo audio track to serve as a final mix track. I'm labeling the aux track "Reverb Aux," and the stereo audio, "Final Mix." Click on the "input" for the reverb aux track: you should see a list of inputs, including the busses we made.
Choose "Reverb Bus" for the input. Set the output to "Final Mix Bus" (Also set the Final Mix track input to "Final Mix Bus."
In this example, I'm going to set the output of all other tracks to "Final Mix Bus."
(This part is optional)
A nice shortcut is selecting the first 10 audio tracks, and then Studio -> "Audio Assignments..." You can set all inputs to "None" and all outputs to "Final Mix Bus."
In the end, your session should look like this:
Almost done. Switch over to the Mixing view. Let's insert DP's "ProVerb (stereo)" on the Reverb Aux track. Click and hold on the dark gray boxes near the top of the channel to see the list of inserts.
You can use the default reverb or pick one yourself. Just set the level to 100%.
And now the FUN part! Above the "mute" and "solo buttons are the sends. Choose "Reverb Bus" for any track whose signal you want to send the reverb aux. You can move the knob to the left to set the amount of signal that is sent to reverb.
That’s it!
Notice that the output of all the audio tracks (and the Reverb Aux track) are routed to the Final Mix track (via the Final Mix Bus). But the audio tracks "send" their audio into the Reverb Aux using the Reverb Bus. If you want to learn more about bussing and using effects on aux tracks, make sure to sign up for Training Session at the Learning Center.


