Showing posts with label Guerilla Production. Show all posts

Wednesday, June 8, 2011

Waveform Wednesday: Get Your Mix On

Hi everyone,
In honor of tomorrow being the Guerilla Production Techniques forum on mixing, here are some tracks to practice with. Click here to download isolated tracks of a re-do of Red Hot Chili Pepper's Snow (The "hey oh" song). This download is a zip file that needs to be un-archived, and it is a folder containing audio files. Import these into whatever DAW you prefer, all right to bar 1. The tempo is 105 bpm.

Try adjusting volume and panning to create a space for everything, and try some guitar and bass amp plug-ins. Listen to the original track and compare.

Read up on all these Sound on Sound articles on Secrets of the Mix Engineers for tips.


-by LC Tech Blog contributor Chris Fitzgerald
Wednesday, May 25, 2011

Waveform Wednesday: Beef Up Your Kick Drums

Do you find your kick drum to be weak in the mix, or not as powerful/punchy/full/heavy/[insert other descriptive word here] as you would like? Use your kick drum to trigger a low sub synth sound to fatten up the bottom (or eat a lot of twinkies).

You can do this in any number of DAWs, but I’ll walk through the setup in Logic.
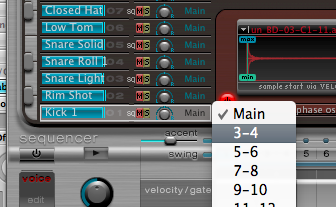
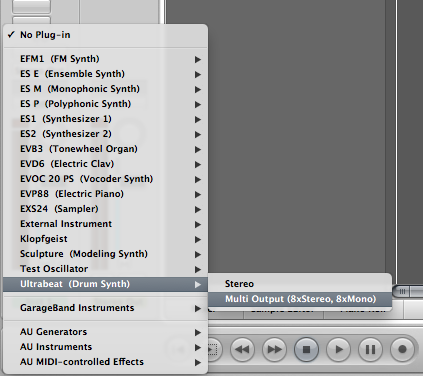
Route your kick drum track out through a bus. I’m using a pattern sequenced in Ultrabeat, so I created a multi-output Ultrabeat and routed the kick through output 3-4 in order to isolate it.


Then create an aux track for output 3-4 from the Ultrabeat (click on the + on the U.B. mixer track). The kick is now isolated on this aux track.

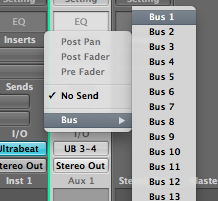
Set up a bus send assignment on the aux track, which in Logic will automatically create another aux.

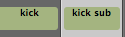
It becomes very important to name your tracks and stay organized. Get in the habit of doing this now and you’ll save yourself headaches later. I named them Kick and Kick sub

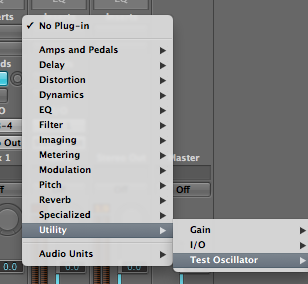
Option-click on the send amount from Kick, which in Logic will move it to the default position (0 db). Now we are sending signal to the kick sub aux. Insert a test oscillator plug-in on the sub synth track. It will immediately play a tone, so make sure the volume is not too loud. Change the frequency to around 60 Hz (very common for this type of application).

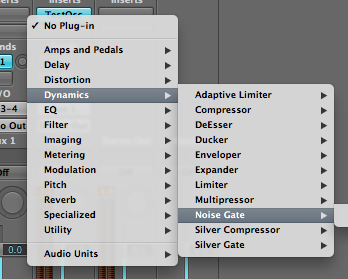
This 60 Hz tone will be triggered every time the kick drum plays. To set this up, add a noise gate plug-in after the test oscillator.

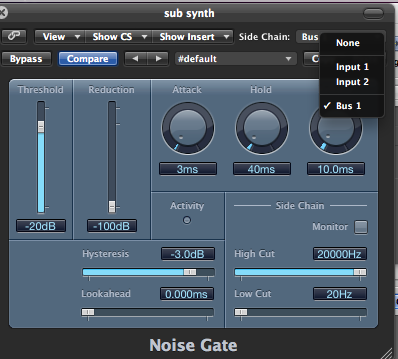
Set the side-chain input of the noise gate to bus 1


You are now in business! Adjust the noise gate release accordingly, and mix in with the original kick to your taste. Download my session file here.

Thursday, April 28, 2011

Capture Recording in Logic

Have you ever played something really great along with your project only to realize you weren't recording?  With capture recording you will never accidentally lose a performance from forgetting to press the record button again.  Capture record saves your performance data to the buffer even when you aren't recording, all you need to is press the capture record button in the transport after playing, and what you played appears in the arrange window.  The only thing you have to do is remember to press the capture record button right away, as pressing play wipes the buffer information.


To add the capture record button to the transport control click (or right click) the transport then click "customize transport bar..." and select "Capture Recording" from the list.


Wednesday, February 23, 2011

Bussing and Aux Track Effects in DP


Inserting an effect on an auxiliary track is advisable when you want to apply the same effect to many different audio/instrument tracks. The key to working with any type of audio routing is understanding "bussing."
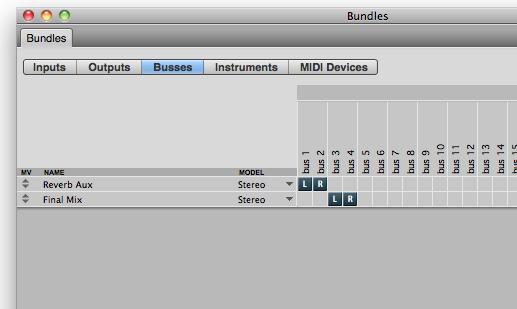
In DP, buses help connect audio tracks and aux tracks together, in any combination. In this example, we’re going to add an aux track to host a reverb plug-in to be used by multiple tracks. Before getting started, open up the "Bundles" window by going to Studio -> Bundles. Click on the "Busses" tab. Click "add" and let's create 2 busses- by default, they're labelled "bus 1-2" and "bus 3-4." I've renamed them to be more useful: "Reverb Bus" and "Final Mix Bus."

Now, looking at the Tracks window, suppose we already have a session with 10 audio tracks. Let's add an aux track: Project -> Add Track -> Aux Track.

Next, let's also add another stereo audio track to serve as a final mix track. I'm labeling the aux track "Reverb Aux," and the stereo audio, "Final Mix." Click on the "input" for the reverb aux track: you should see a list of inputs, including the busses we made.

Choose "Reverb Bus" for the input. Set the output to "Final Mix Bus" (Also set the Final Mix track input to "Final Mix Bus."
In this example, I'm going to set the output of all other tracks to "Final Mix Bus."
(This part is optional)
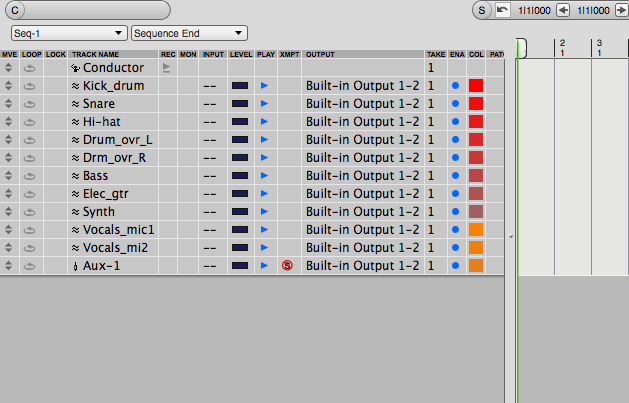
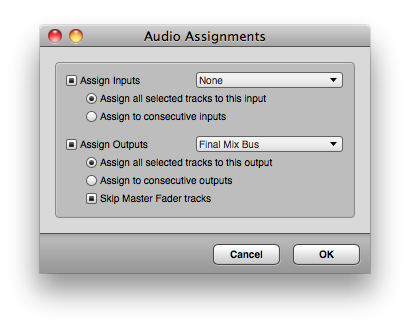
A nice shortcut is selecting the first 10 audio tracks, and then Studio -> "Audio Assignments..." You can set all inputs to "None" and all outputs to "Final Mix Bus."

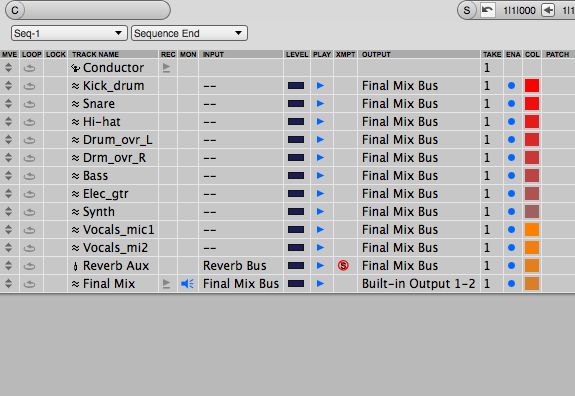
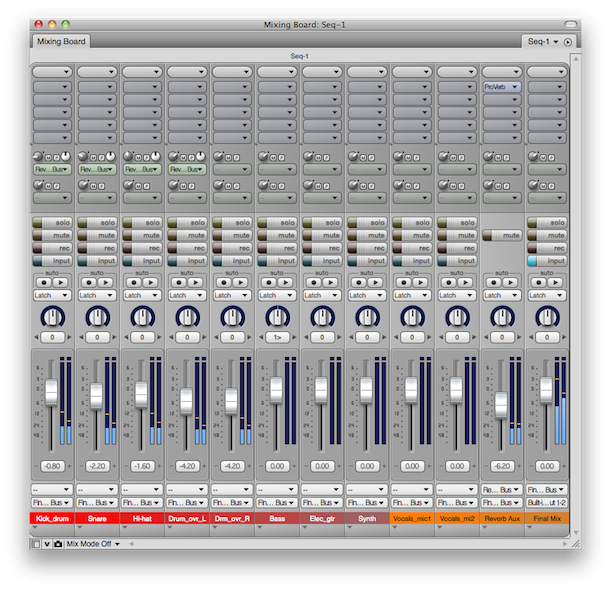
In the end, your session should look like this:

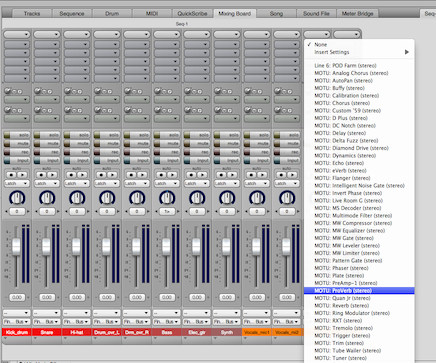
Almost done. Switch over to the Mixing view. Let's insert DP's "ProVerb (stereo)" on the Reverb Aux track. Click and hold on the dark gray boxes near the top of the channel to see the list of inserts.

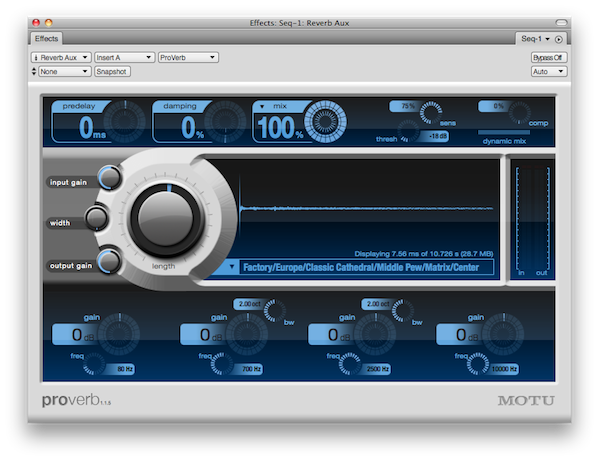
You can use the default reverb or pick one yourself. Just set the level to 100%.
And now the FUN part! Above the "mute" and "solo buttons are the sends. Choose "Reverb Bus" for any track whose signal you want to send the reverb aux. You can move the knob to the left to set the amount of signal that is sent to reverb.

That’s it!
Notice that the output of all the audio tracks (and the Reverb Aux track) are routed to the Final Mix track (via the Final Mix Bus). But the audio tracks "send" their audio into the Reverb Aux using the Reverb Bus. If you want to learn more about bussing and using effects on aux tracks, make sure to sign up for Training Session at the Learning Center.

Sunday, November 21, 2010

Flex Time

 
One of the best additions to Logic 9 was “Flexible Audio.” Much like ProTools’ “Elastic Audio,” users can now zoom in and fix any audio they want to get that performance just right. And with Logic’s user-friendly design, this feature has been made easier than ever.

There are two approaches to using Flexible Audio. If you press ESC, Logic will open up a tool pop-up window listing several features. At the bottom, you will find Flex Tool (shortcut R). This approach to using Flex Time is the most easy and straightforward. When you click on the audio region you wish to edit, you will be shown a popup asking you how you wish to analyze the audio. These different options will analyze the audio differently according to its transients, depending on which one you do.

There are 4 options:


  • Slicing: Will separate the audio region into many different regions, useful for drum programming and editing.
  • Rhythmic: Meant for drums or percussion. Will NOT slice the audio, but allow you to make major transient adjustments. (Low CPU load)
  • Monophonic: Good for one voiced instruments and voice. (Medium CPU load)
  • Polyphonic: Best used for chorded instruments like guitar, piano, etc. (High CPU load)                                            
Using the best fit for your instrument, you will be able to make your adjustments with ease.

If you are looking to get more in depth with Flex Time, there is an option at the top of the Logic window labeled “Flex.” This will display a button on all of your tracks. Pressing the button, you’ll find that you’re offered the same options as before. However, when you enable one of the options, you’ll see the region go dark and become outlined with markers (see above). These markers mark the starts of the transients that Logic has recognized based on your selection (Monophonic, Rhythmic, etc.). This will enable you to manipulate the audio much further than you could with the previous option. As you alter your audio, the regions that you are stretching become Red, while the regions you are compressing become Green. To minimalize the audio effects of stretching the transients like this, be sure to find the place with least coloration. 

by Peter Brown

Wednesday, October 27, 2010

Automation in Logic

In Logic Express and Pro you can automate almost anything you like. Want the volume of a track to fade in? No problem! Want to control the frequency cutoff of your low pass filter? You got it!
Just enable automation mode: (keyboard shortcut A)

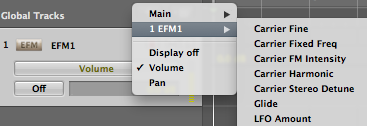
and choose what you would like to automate:

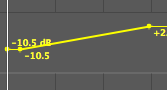
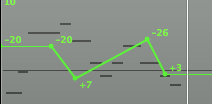
Then with the arrow tool, click to add new automation anchor points and drag them around as you like:

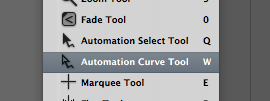
If you want to get all fancy, choose the automation curve tool and change the slope of the automation line:


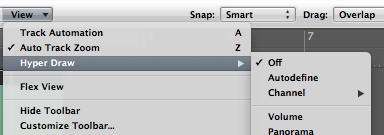
Access more automatable parameters by going to the Arrange window View menu, and open the Hyper Draw drop down menu.

Friday, July 30, 2010

Check out the Propellerhead youtube channel

Propellerhead is releasing 52 Record/Reason video tutorials, one per week. Check them out and subscribe to their youtube channel at:
http://www.youtube.com/user/PropellerheadSW