Wednesday, April 25, 2012

Waveform Wednesday: Auto Tune Techniques in Digital Performer

Everybody loves auto tune! Whether you’re going for the over the top T-pain style autotune or just a subtle fix to an otherwise good take, autotune can be a useful tool or effect. Logic and Digital Performer both have autotune functions that ship with the software and both can be used to get effect. The main difference being that in DP the autotuning happens on the actual track, as well as having control of how you’d like to tune each individual note.

Once you have a track you’d like to tune double click on the audio to open the sequence editor then switch the editing view to pitch.

Once there make sure to zoom in so you can see the individual notes to edit.
Now that you’re in pitch edit mode, there are a couple different things you can do.
First is you can auto correct all the pitches by going to the audio menu and select “pitch correction”, there are a couple different options, the quickest and easiest being “quantize pitch”, which will drag any notes that are off onto the next closest pitch.

You can also adjust how much you want DP to cut up each individual note, so you have more or less options of individual segments to edit.
Another thing to make sure you do is set the pitch mode, so DP knows how to properly use pitch correction on the audio, select either instrument or vocal. This is also under the audio in “pitch correction”.

The second way to use pitch-correction in DP is manually. To do this, zoom into the track so you can see each note and simply drag each one to the desired pitch. Another function you can do manually is adjust the level of vibrato on each note, to do this hold down options and click the note you’d like to edit and then drag up to increase the vibrato or drag down to flatten it (T-pain style).

-by LC Tech Blog contributor Marcus Bagala

Monday, April 9, 2012

Mac Daddy Monday: Creating a PDF file

PDF is an acronym for Portable Document Format, and is a standard web image file for forms and documents. Anytime you need to e-mail or upload a resume, score, or other document, converting it to a PDF will ensure that your recipient will be able to view the file.

Creating a PDF file is very easy, and is the same process on all Mac applications. Simply go to the File menu and select Print


From the print dialog window, instead of printing, click PDF in the bottom-left


Now you have the option to save a PDF file to your computer, e-mail to someone, and more options.

-by LC Tech Blog contributor Chris Fitzgerald

Uploading Files to Inside Berklee Courses

For students that are in fully online or blended courses, here is how you upload files to the Inside Berklee Courses system.

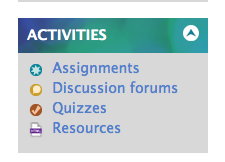
1.) Locate the assignments link on the left


2.) Select the homework assignment


3.) Locate the Upload files button


4.) Click Add then Locate file on my computer


5.) Click Choose File, then browse to find the file to upload, select it and click Upload this file


6.) Click Save changes, and double check to make sure the file uploaded properly

Wednesday, April 4, 2012

Waveform Wednesday: Kontakt and Logic

How to setup Kontakt and Logic.

1.) Create a new track and make sure to choose a Software Instrument.

2.) Click and select multi-timbral and this will automatically create 16 midi channels.


3.) After creating the tracks, click on the plug-in input and select AU Instruments and then select Kontakt - Multi Output (16 x stereo).


4.) Each channel strip corresponds with different midi channels from 1-16.

5.) Now in Kontakt, choose and add instruments. (not more that 16). The first instrument on the first track in Logic are automatically set to midi channel 1.


6.) In Kontakt, you will have to open the Output mixer and the default settings in Kontakt will be as illustrated. Add as many channels as your available instruments.


7.) Double click to rename the outputs.


8.) In each instrument in Kontakt, you will have set the outputs as illustrated.


9.) Click the [+] in the mixer on logic. This will automatically creates Aux tracks on subsequent midi channels.


Happy sequencing! :)

by LC Tech Blog contributor Dania Zainuddin

Wednesday, February 22, 2012

Waveform Wednesday: Creating our Own Audio Samples in Logic


Audio sampling is something that I have come across recently and consequently am having a lot of fun with.  I have sampled everything from the Duke to Samuel L. Jackson in pulp fiction. The great thing about audio sampling is that you can take any sound you want, and make an instrument from it. Now there are plenty of methods and various ways of going about this but here is how I learned and it’s pretty easy. With a few steps you can create your own audio samples and load them into an instrument.
The first thing you want to do is import the track you want to sample from, onto an audio track in Logic. As you can see I have loaded the sample “Feelin Alright” by Joe Cocker into Logic.  

The next thing we want to do is select your region and go to the sample editor window. Here we can edit what audio samples we want to save, in order to create an instrument.  We want to select sections of the song, not the whole thing. This way when we create the instrument we can simply trigger the sections through our MIDI work stations.
So go ahead and select how many ever samples you want by highlighting the section of music you would like sampled, going to the audio file tab and selecting “save selection as.”  Save them all to the same place so you can find them easily when we go to create our instrument. For this particular project I had 7 different samples.
Now that we have created our samples, its time to load them into an instrument in Logic. The first thing we need to do is create a midi track and load in the EXS24. This is a great sampler.
Next we open up the EXS24 and select “edit.”  Here we get the EXS24 Instrument Editor.  This window allows us to create out sampled instrument.
 From here we need to go “Zone” and then “Load Multiple Samples.”  Go find the samples you created and load them all in. Shift click them all and click “add” and then “done.”
Now this box appears.  We want contiguous zones selected and now its asking us for “zone width” and “start note.”  The start note is the key the sample will begin on.  It defaults to C1 which is fine.  The zone width determines if the sample can be played in different pitches.  If you change the zone width from 1, the default, to 12 there will be 12 half steps of the sample.  A whole octave.  This can be done to your preference.  For our purpose we will leave the zone width to one and that is something you can experiment with at a later time. Click “ok.”

So now our samples are loaded into our instrument.  Go ahead and play it.  
Cool right?

Theres a couple things you should be aware of now. First of all the 1shot box is going to be checked by default. This means that the whole sample will be played by the trigger. Doesn’t matter if the sample is 2 seconds or 2 minutes long. The whole thing sample play. Personally I uncheck these boxes so that I can control how long the sample is by how long I hold the trigger down. This also helps create rhythm with our samples. Also there is a reverse option to the right of the 1shot box. Check these boxes if you’d like your sample played in reverse. Sometimes this can have a very cool effect.  
Be sure to save the instrument as you X out of the Sample Instrument Editor window.  Record enable and you’re ready to add your newly created sampler to any projects you have going.
Enjoy!
by Kai Sorensen, LC Tech Blog contributor

Thursday, February 2, 2012

Waveform Wednesday: Sampling in Reason - Sound Collage Contest Tips

The Learning Center's Sound Collage Contest has begun! We recorded audio samples of construction sounds, and you can use them to make a piece of music and compete for nearly $3,000 worth of prizes from iZotope and I.K. Multimedia.

Before you start this tutorial, download the samples for the contest (and read the rules and regulations) at this link.

Reason is a powerful tool for sampling. In this tutorial we'll explore the NNXT Advanced, the Kong Drum Designer and the Redrum.

Sampling
A sample is an audio file. Samplers play back audio files in a variety of ways. A sample map determines which MIDI keys trigger which samples, and at what pitch.
Add an NNXT to your Reason rack. Right-click on it and initialize patch (this will dump the patch and all the samples loaded into it), and flip open the NNXT's Remote Editor.

To add samples, click the browse sample button (not the browse patch button) located at the bottom of the screenshot below.


In the SCC5_Download folder, choose an audio sample. Using the Remote Editor, you can have the sample play forward, backward, looped, change the root pitch, start time and more.

Now add a Kong Drum Designer to your rack, and again right-click on it and initialize the patch. Open the Show Drum and FX area, and add an NN Nano Sampler. As with the NNXT, click the load sample button to add an audio sample.

The Kong is great for rhythmic elements, listen through the samples and find some percussive elements to load.

Now add a Redrum device, initialize, and load samples onto the individual tracks.

Using the select buttons on the tracks, the run button, and the trigger buttons, you can create a pattern sequence.

There are Reason classes available! New to the program? Take Reason Essentials. For the topics in this blog post, take Reason Sampling, and Reason Drum Production with Kong. Click here to view our calendar of training sessions. You can also sign up for a music software tutor at this link.

Good luck on your Sound Collage!

-by LC Tech Blog contributor Chris Fitzgerald