Wednesday, February 23, 2011

Bussing and Aux Track Effects in DP


Inserting an effect on an auxiliary track is advisable when you want to apply the same effect to many different audio/instrument tracks. The key to working with any type of audio routing is understanding "bussing."
In DP, buses help connect audio tracks and aux tracks together, in any combination. In this example, we’re going to add an aux track to host a reverb plug-in to be used by multiple tracks. Before getting started, open up the "Bundles" window by going to Studio -> Bundles. Click on the "Busses" tab. Click "add" and let's create 2 busses- by default, they're labelled "bus 1-2" and "bus 3-4." I've renamed them to be more useful: "Reverb Bus" and "Final Mix Bus."
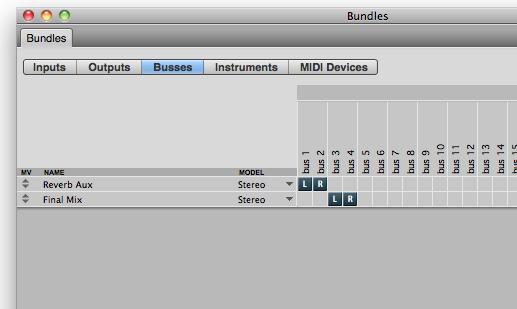
Now, looking at the Tracks window, suppose we already have a session with 10 audio tracks. Let's add an aux track: Project -> Add Track -> Aux Track.
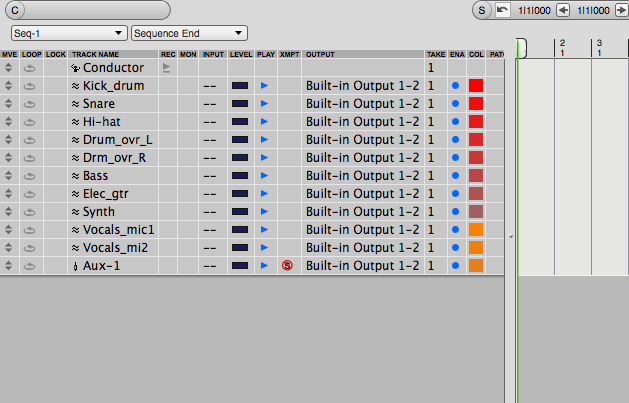
Next, let's also add another stereo audio track to serve as a final mix track. I'm labeling the aux track "Reverb Aux," and the stereo audio, "Final Mix." Click on the "input" for the reverb aux track: you should see a list of inputs, including the busses we made.

Choose "Reverb Bus" for the input. Set the output to "Final Mix Bus" (Also set the Final Mix track input to "Final Mix Bus."
In this example, I'm going to set the output of all other tracks to "Final Mix Bus."
(This part is optional)
A nice shortcut is selecting the first 10 audio tracks, and then Studio -> "Audio Assignments..." You can set all inputs to "None" and all outputs to "Final Mix Bus."
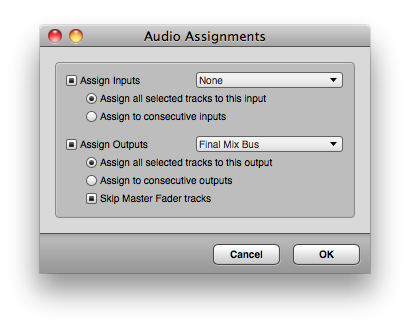
In the end, your session should look like this:
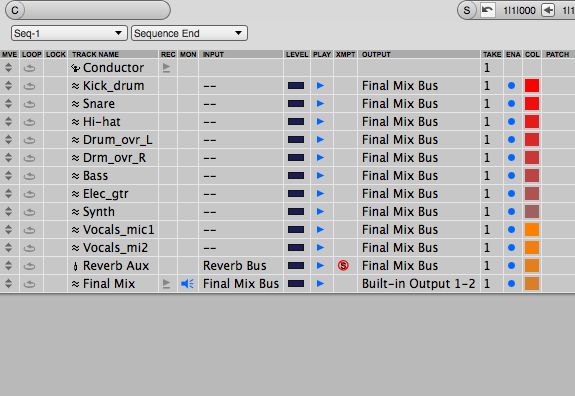
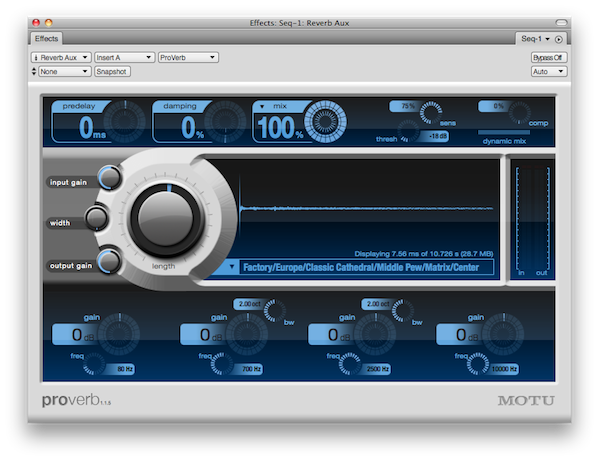
Almost done. Switch over to the Mixing view. Let's insert DP's "ProVerb (stereo)" on the Reverb Aux track. Click and hold on the dark gray boxes near the top of the channel to see the list of inserts.
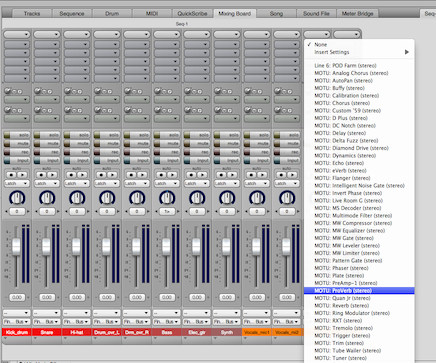
You can use the default reverb or pick one yourself. Just set the level to 100%.
And now the FUN part! Above the "mute" and "solo buttons are the sends. Choose "Reverb Bus" for any track whose signal you want to send the reverb aux. You can move the knob to the left to set the amount of signal that is sent to reverb.

That’s it!
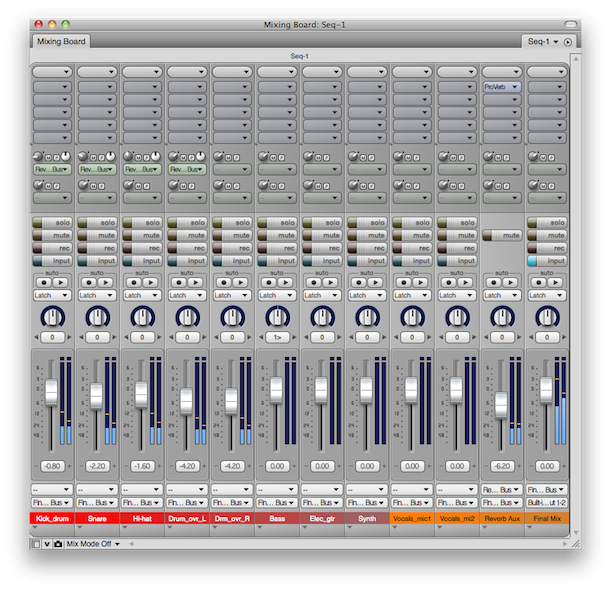
Notice that the output of all the audio tracks (and the Reverb Aux track) are routed to the Final Mix track (via the Final Mix Bus). But the audio tracks "send" their audio into the Reverb Aux using the Reverb Bus. If you want to learn more about bussing and using effects on aux tracks, make sure to sign up for Training Session at the Learning Center.

Sunday, February 13, 2011

Cropping and Resizing Images in Preview

You don't need an image editor to crop and resize images it's simple to do in Preview. 

To crop an image, open it and then click the Select button in the toolbar. 

Click and drag to create a rectangle around the area you want to capture in your crop.  As you drag the mouse, you'll see the pixel dimensions for the current selection.

Once you've made your selection, choose Tools: Crop or press command-K.

You can then resize your image and even change the resolution.  Choose Tools: Adjust Size to enter a width or height in pixels, inches, or other units.  (choose the unit you want from the pop-up menu to the right of these fields).  To maintain the image's proportions, make sure to select that Scale Proportionally option.  To make an image smaller without losing quality, keep the Resample Image option selected.

From: Total Snow Leopard: Macworld Superguide. Ed. Kelly Turner. [San Francisco]: Mac, L.L.C., and International Data Group, 2008. 51-52. Print.
 

Wednesday, February 9, 2011

Discovering Reason

For those of you looking to add some extra spice into your Sound Collage Contest entry or Reason projects in general you should definitely check out the "Discovering Reason" series on the Propellerhead website.  There are tutorials and sample projects to download on advanced and creative uses of common devices such as Dr. REX and Redrum, as well as tips on using the less used and understood devices like the Combinator, Matrix, and Spiders.  There are also 16 articles on "Thor Demystified" because who couldn't use some help with that one!

Check out "Discovering Reason" and start exploring the abundant possibilities to make your Reason projects more interesting and unique.

Monday, January 24, 2011

Ways to Protect Your Laptop

There are more ways than you might think to protect your laptop. There are also different things that you might not want to think about that you can protect yourself from. Here are some things you can buy/do to protect your laptop.
Protecting your computer always comes at a cost, whether that be actual money, added weight, added steps, etc. Here are a few different choices to help protect your computer with the ups and downs associated with them.

Physical Damage
Case – A case is always a good investment to protect your laptop. I have to admit, I’ve dropped my laptop square onto cement on more than one occasion, and if I didn’t have a plastic case on there, it would most certainly be horribly dented! They even come in cool colors so you can individualize yourself! As great as they are, companies know that you want that protection. Prices range from $40-$60 for most cases, but if you search Amazon.com, you can maybe squeeze that price to $30-$40 every once in a while. The leading brand for Macbooks/Macbook Pros is Speck Products. Another issue with cases is how clunky and heavy they are. Expect to feel a difference when you put your laptop in your backpack and start walking.
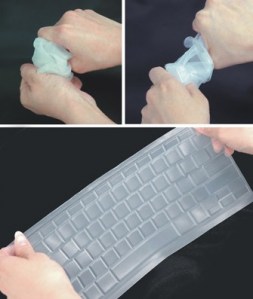
Dust Cover – You can buy a silicon covering for your keyboard to keep out dust/dirt. I used to use one specifically for working outside during pollen season. It works exactly as it should, but be wary: The keys feel a bit weird, and sometimes almost sticky from the silicon. They also come in crazy colors though, so you can have a unique-looking laptop! It can’t hurt to have a cover, but is it practical? Well, that is up to you and where you use your laptop.


Theft Protection
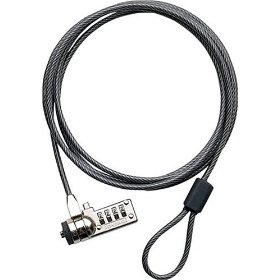
Cable Lock – Did you ever look at the slots on the side of your computer and see that one small hole that just doesn’t seem to be marked as anything?  It is probably for a Cable Lock. You can buy cable locks at places like Best Buy and Circuit City. Their sole purpose is to connect your laptop/computer to any stationary item (table, desk, bench, tree, etc.), keeping it from going anywhere. They work great, but if you hook them up and unhook them repeatedly (through general use, as opposed to setting it up and leaving it there permanently), you can easily damage that little hole on the side of your laptop with scratches and deterioration. It’s something that if you are mindful of, it shouldn’t be a problem. Some good Cable Locks are made by Tryten.

Screen Locking – This is more of a software issue, but it still counts as protection. If the unfortunate situation arises where someone does actually steal your laptop, it doesn’t hurt to know that the thief won’t be able to access your account. Even if he hard-restarts the computer from the screen lock, he would need to know your password to get back into your account anyways. You can lock your screen when it wakes from sleep in the “Security” Preference Pane in the System Preferences area.
Hopefully these should be some helpful ideas for protecting your computer. There are, of course, other things you can do to protect yourself from both your own clumsiness as well as others’ evil doings. Figure out where you are most vulnerable, and adjust yourself to fit that area (i.e. using your laptop while on the train? Big bumps could make it fall off of your lap, so PUT A CASE ON IT!).
Good luck out there!

Tuesday, January 18, 2011

Forwarding Your Berklee.net E-mail

Forwarding your Berklee.net e-mail to another e-mail account is easy. After logging into my.berklee.net, go to E-mail then to Filters.


Next, click on Forwarding Filter and put in the e-mail address you would like to forward your messages to. By leaving “Keep a copy in INBOX” unchecked, your messages will be deleted after they are forwarded, ensure that your berklee.net inbox will not get cluttered.

Tuesday, January 11, 2011

Oxygen25 & Reason

In order to use your Oxygen25 keyboard with Reason, you must have the latest driver. Click here to install.


Once installed, go to Reason's preferences


Change to keyboards and control surfaces


and choose auto-detect surfaces


With the driver installed, and the Oxygen25 connected, it will appear as an attached surface.

Monday, December 20, 2010

Frosty Text in Photoshop

Start by filling the background with a solid color or gradient of your choosing, using either the paint bucket or gradient tool.

Next type in the text you want to make look frosty using the Text tool. (This works best if the font is really large and bold mine here is around 240px)

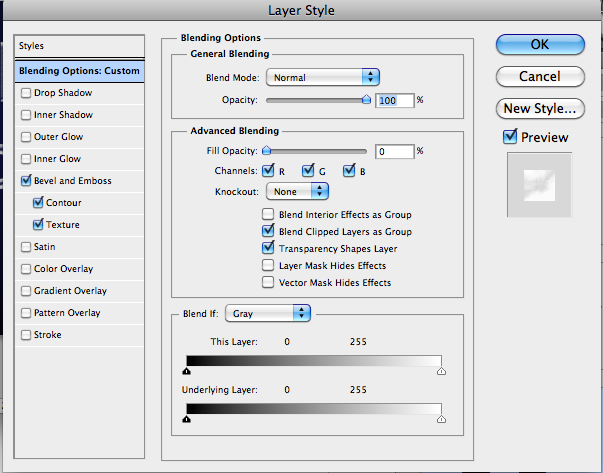
With the text layer selected click on the “fx” button at the bottom of the layers panel to open the Layer Style dialogue box.  First thing you’ll want to do is turn the “fill opacity” in “advanced blending” down to 0%.  This allows the text to be see through while the layer styles we will add can be seen.
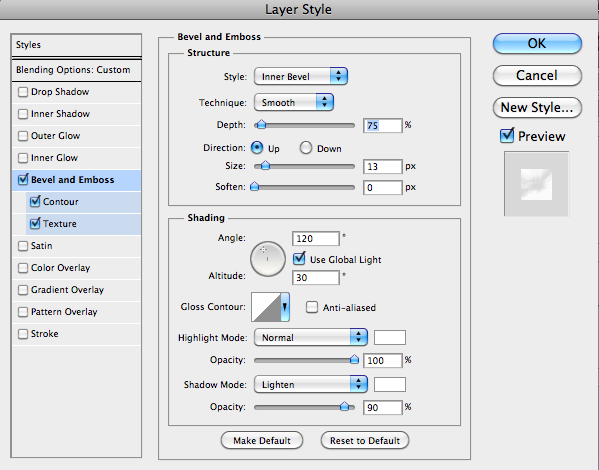
Next select the “Bevel and Emboss” option. Set Style: Inner Bevel, Technique: Smooth, Depth: 75%, Direction: Up, Size: 13 px, Highlight Mode: Normal and color white, Shadow Mode: Lighten and color white with opacity 90%.
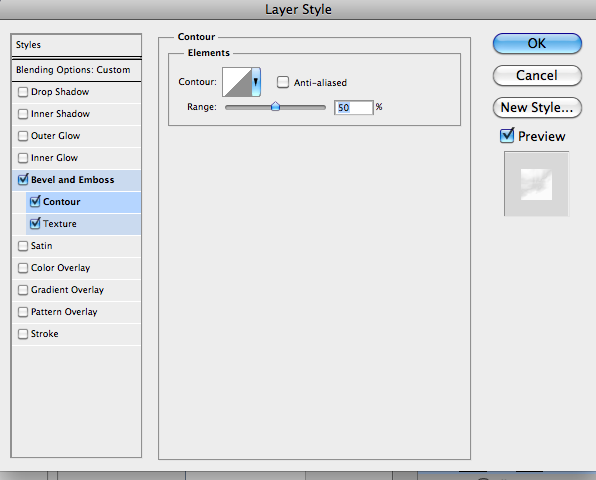
Select the Contour Make sure the Range is set to 50%.
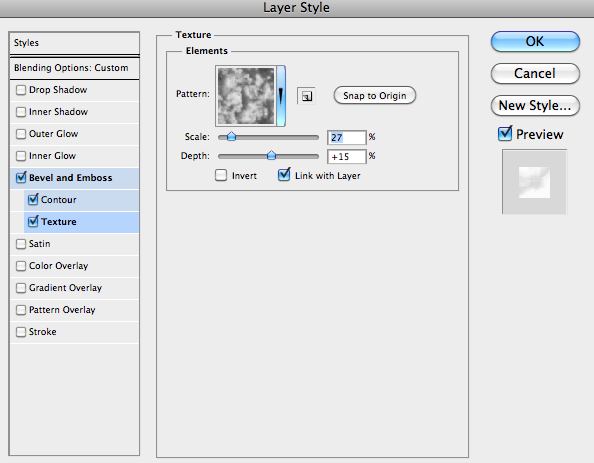
Finally Select the Texture Option.  Change the Texture to “Clouds,” Scale: 27%, and Depth: +15%.
Ok we are halfway there as you can see it’s starting to look a bit frosty:
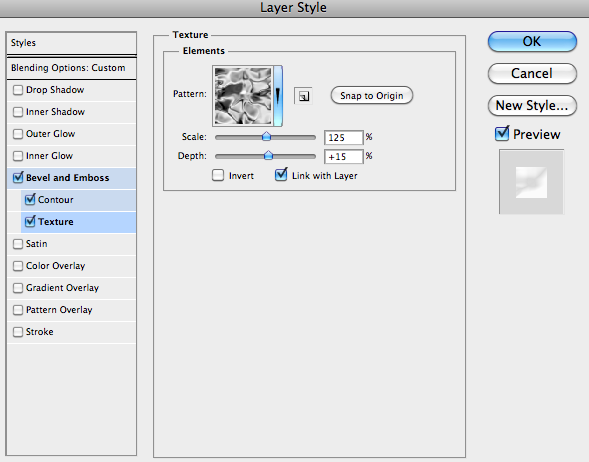
Duplicate the text layer (Command + J), and open up the Layer Style dialogue box again.  Leave everything the same except this time from the texture option select “Satin,” Scale: 125%, and leave Depth at +15%.
And there you have it, some awesome frosty text to use!
-Kat