Thursday, September 30, 2010

Finale Formatting- Part 1

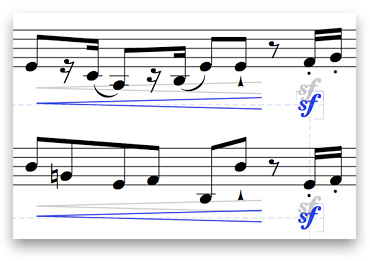
The size of the music (notes, staves, etc) in Finale can be changed using the Page Layout tool. Perhaps the default music size looks too big or clumsy for the score you're writing. Other times, you may need to make the systems smaller before moving and rearranging the number of systems per page (very common).
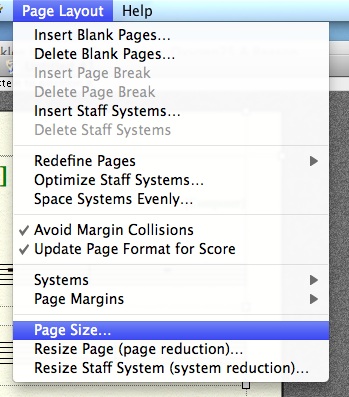
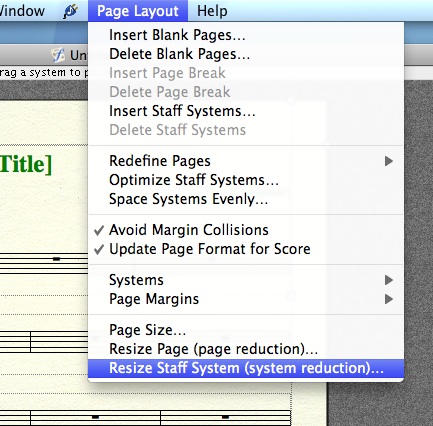
To resize the music, under Page Layout menu, go to "Resize Staff System (system reduction)..."
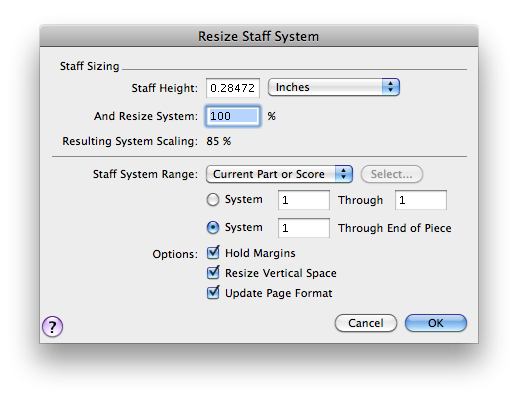
In the "Resize Staff System" menu, you can resize the music by a percentage of the staff height. This way, 100% is always fixed (you can always return to 100% if you don't like the appearance of your resized music).

In part 2, we'll look at how to rearrange the systems on a page.

Wednesday, September 29, 2010

Sibelius Shortcuts

One of the most frustrating aspects of learning new software programs is not knowing the shortcuts and the fastest way to complete a task.  In this post we’ll take a look at some shortcuts to make entering notes in Sibelius quicker.


The first thing to realize about Sibelius is the entry keypad on the screen corresponds to the numeric keypad on a full computer keyboard.  The diagram below shows how the keys line up:
So as you can see if you want to enter a quarter note all you have to do is press 4, an eighth 3, to add a sharp to a note 8, etc.  Other things to notice are to change to rests you hit 0 and to switch between the different layouts shown at the top you press the +, - will bring you back to the first layout. The numbers at the bottom of the keypad refer to layer you are typing into.
Here is a list of some other useful shortcuts to help you create projects in Sibelius quicker:

·   A-G:  Enters a note of the corresponding pitch on the staff
·   1-9 (on main keyboard):  Enters corresponding interval above selected note
·   Shift + 1-9:  Enters corresponding interval below selected note
·   Up arrow: Moves selected note up in pitch (or moves text)
·   Down arrow: Moves selected note down in pitch (or moves text)
·   Command + Up arrow:  Moves selected note up an octave
·   Command + Down arrow: Moves selected note down an octave
·   Right Arrow: Moves to the next note
·   Left Arrow: Moves to the previous note
·   H: Adds crescendo (Shift + H: decrescendo)
·   I: Opens the instrument menu (to add an instrument to the score)
·   K:  Opens key signature menu
·   L:  Opens lines menu (includes trills, rits, accels)
·   P: Plays your score (escape or O to stop)
·   Q:  Opens Clefs menu
·   R:  Repeat something selected (like copying/pasting)
·   S:  Adds slur – use space bar to extend them
·   T:  Opens time signature menu
·   X:  flip a selected note or slur
·   Escape:  cancels any input mode, dialog box, etc.

Tuesday, September 28, 2010

Saving Time with Sibelius

If you aren’t already using Sibelius, now might be the time to switch.  Sibelius 6 has what might be one of the most amazing, time saving features to hit notation software: Magnetic Layout.

Basically, what magnetic layout does is makes sure all the dynamics, lyrics, chord symbols, rehearsal marks, and other objects do not collide with one another.  These objects are automatically shifted (without you having to do anything!) into neat rows and columns making the best use of space on the page.  Staves also behave in this way and move out of the way of low/high notes, lyrics, and dynamics.  It also adds extra space between instrument families to make large scores easier to read and saves space when there are staves with not much on them.  In the rare occasion that Sibelius can not avoid a collision it will mark it in red, so you don’t miss it and can fix it.  Check out an example below:

The original position of the crescendo and the sforzando are marked in grey.  The blue markings show where Sibelius has moved them to in order to avoid a collision with the low notes, and still have them line up.  No more spending hours trying to make your scores readable, Sibelius does all the hard work for you!

For more information on Sibelius 6 and magnetic layout check out: http://www.sibelius.com/products/sibelius/6/magnetic_layout.html
If you are brand new to Sibelius check these tutorial videos to Learn Sibelius in One Hour:
http://www.sibeliusblog.com/tutorials/learn-sibelius-6-in-one-hour/or attend a Learning Center Training Session.

Sunday, September 26, 2010

Changing Page Size in Finale

Notation Week is going on at the Learning Center so everyday this week we'll be posting a new blog entry including helpful tips for using Finale and Sibelius.  Today's post will explain how to change the page size in Finale.

By default, new Finale documents are set up as "letter" sized documents. Although this can be changed on the first screen of the "Setup Wizard," many people want to change it later on. The page size can be changed at any time in Finale, using the Page Layout Tool. Go to Page Layout menu, and choose "Page Size…"

The menu that comes up lets you easily customize the page size for the current part/score (or, all parts with or without score). You can also adjust the orientation: "Portrait" (vertical) or "Landscape" (horizontal) view.
If you are planning on printing your document you also need to change the page size under the File menu, then Printer Page Setup.

Wednesday, September 15, 2010

Adam Horovitz Interview on Reason

Check out this video interview of Adam Horovitz (Beastie Boys' Adrock) on Proppelerheads' Reason and Record:


http://www.propellerheads.se/substance/artist-stories/index.cfm?fuseaction=get_article&article=adrock